How Masonry Contractors Build Retaining Walls
Retaining walls are great for preventing soil erosion and other functional landscape features. Yet, a retaining wall could also be aesthetically pleasing and easily add to your property's curb appeal due to its ability to be built with various materials.
Suppose you have been searching for a new DIY project or need a solution to reduce erosion in your garden. In that case, this article will discuss a step-by-step process of building a retaining wall. So, let's dive right in.
Make Your Research
Planning is essential for any successful construction work. Thus, before you begin, you have to research and make a plan. As a beginner, you might want to familiarize yourself with construction codes. For example, local building codes may require permits to build a retaining wall.
So, you must figure out the necessary licenses to get before you can create your retaining wall. Once you have that figured out, you can draw out a plan and get your project approved by appropriate authorities before you begin.
Choose A Material
If you are familiar with construction work, you might be able to handle more materials such as bricks, natural stone, concrete, cinder block and other complex materials. However, as a beginner, we recommend that you build a retaining wall using masonry blocks which are easier to work with.
You can stack up the blocks to three feet, creating the retaining walls with no mortar or concrete. However, if you want a taller retaining wall or more complex designs, it would be best to work with a professional landscape design contractor.
Mark Out Site
Once you have purchased all materials and tools, begin your project by marking the site where you plan to build the wall. You can do this with stakes and a mason line or spray. Ensure that you make enough room to allow a plate compactor through because you need this to compact the soil.
Excavate Area
With a mini excavator or backhoe, you can begin to dig. You might wonder, how deep do I need to excavate? This would depend on the type of soil and wall you are building. If you live in an area where it freezes regularly and building a retaining wall affixed with mortar mix or concrete, you would need to dig beyond the frost line.
However, if you live in an area where it isn't icy cold and you are building a simple retaining wall that isn't bonded with a mortar mix, you can easily dig away the topsoil and form a solid base for your walls.
Prepare Base
After excavating the trench, line the back and bottom with landscape fabric and set a perforated drain pipe in the trench for easy drainage. Doing this does not only prevent water buildup that increases the pressure against a retaining wall, but this can also reduce drainage issues that might affect the base of your project in the future.
Next, add at least 4 inches of gravel to create a border and solid base between your soil and wall. Then ensure you tamp it down with a plate compactor and cover it with an inch of bedding sand.
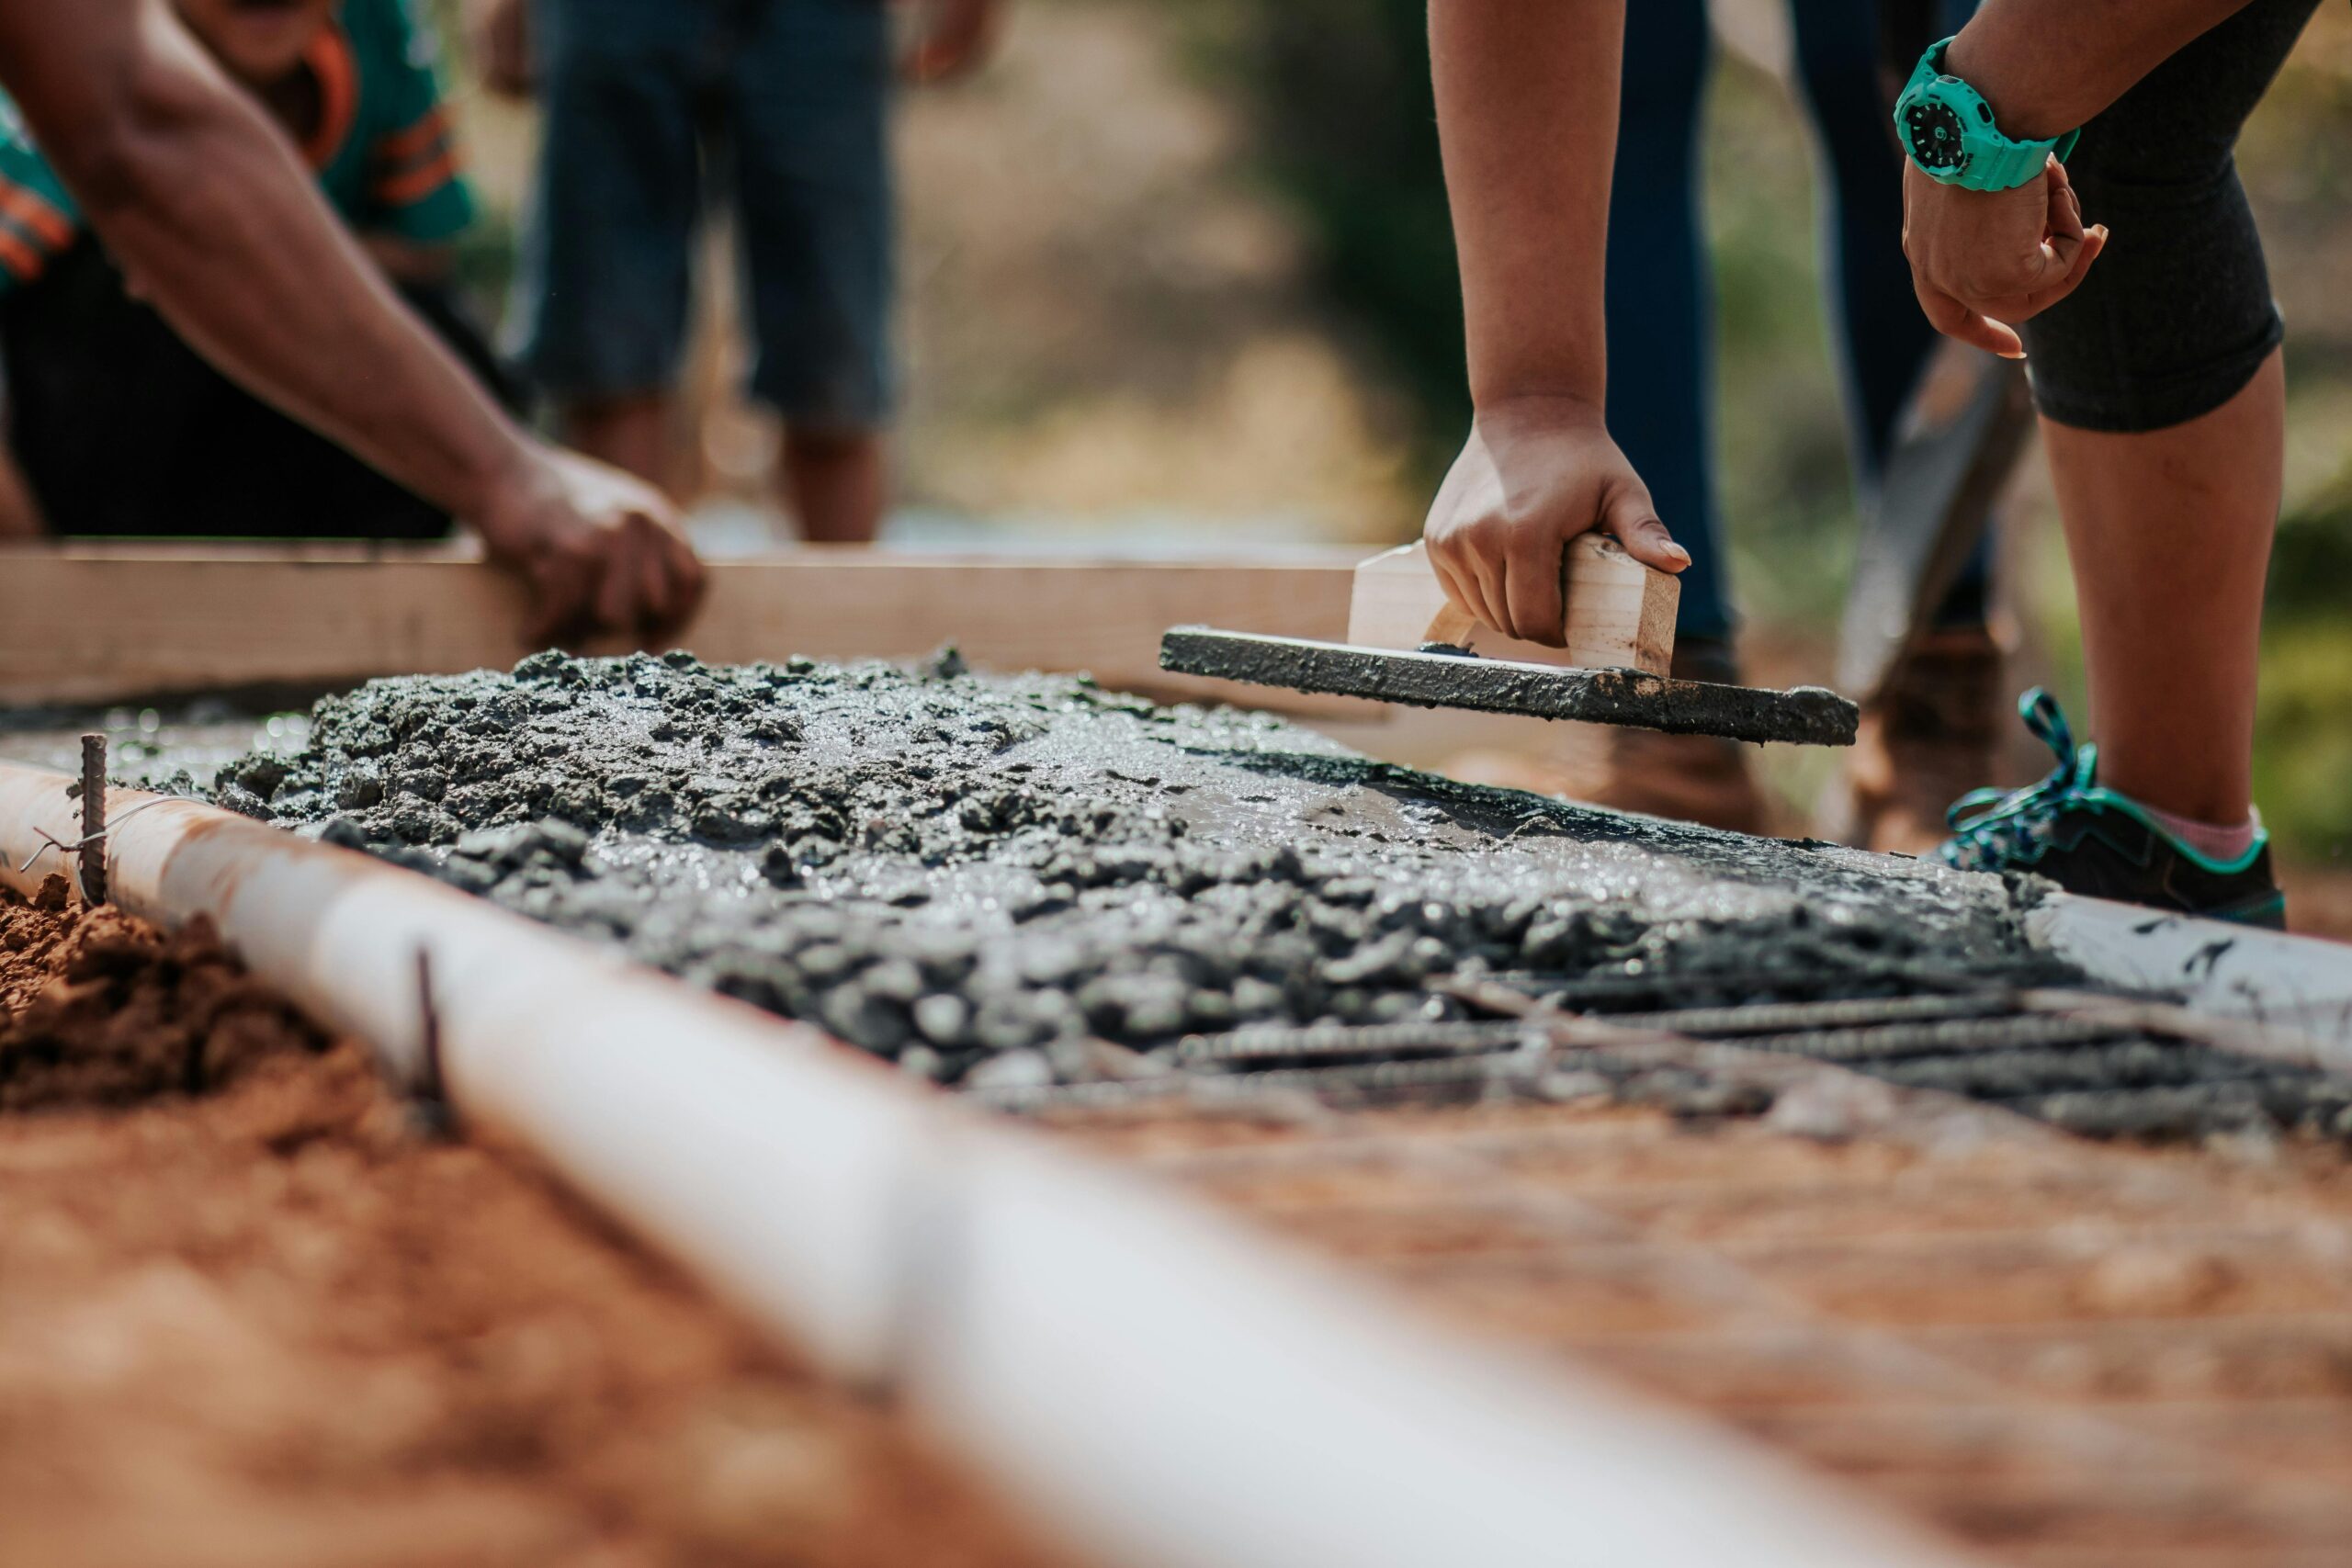
Build Footing
Building footing might be an optional step if you are building a non-mortared retaining wall, but we recommend doing it to increase the strength of your retaining wall. So, set up your wooden forms, lay them and reinforce them with a rebar mesh.
Then proceed to pour the concrete mix, ensuring that it is adequately mixed and not too watery. The right texture is damp, not wet. So, if you have the latter, it is best to know that you haven't mixed your concrete correctly. After pouring the cement, use a screed to even the surface.
Lay The Initial Blocks
Finally, it's time to lay the blocks. Start at the lowest point if you have sloping ground and ensure that each block is set firmly on the concrete. Ensure that you add backfill with each layer you build and tamp it down with a plate compactor or hand tamper.
Do not add all the backfill when you complete building your retaining wall because it wouldn't compact adequately. Also, adding a backfill with each layer helps easy drainage and prevents moisture buildup against your wall.
Cure
The curing process is the last step of building your retaining wall. Although the curing process is continual, give it a week and allow everything to dry before leaning, walking or sitting on it. A simple rule of thumb is that the longer you leave the masonry blocks to cure, the stronger they are. So, don't be in a rush to sit or lean on your new retaining walls.
Paint The Walls
Painting your retaining wall is optional, but if you want to make it more appealing, you can paint it. Plus, you can do this for both new and old walls. So, if you have an old retaining wall, you can spruce it up by painting it.
For an old retaining wall, the first step before painting is to wash it to remove all moss or dirt and allow it to dry. Once it is dry, you can quickly proceed to clean with a retaining surface cleaner and prepare to paint. Again, do this for both new and old retaining walls.
Usually, you could use latex exterior paints, which contain pesticides and fungicides and are best for painting concrete. However, masonry paints are also excellent for painting your retaining wall if you have used masonry blocks. They are thicker, and you can easily choose to paint your wall in water, latex or oil-based paint.
Conclusion
Building a retaining wall is simple, and it is one of the best DIY projects you could do as a beginner to get familiar with construction. Yet, if you want a more fancy and taller retaining wall, you should hire a professional masonry contractor to help you build one. Contact Masonry Midland TX for more information and help!