Knife Sharpening Basics: Keeping Blades Ready for Homestead Use
Knives are among the most essential tools on any homestead. Whether you’re cutting vegetables, processing meat, or tackling everyday tasks like cutting rope, having a sharp blade makes a world of difference. A dull knife doesn’t just slow you down; it can also be a safety hazard, requiring more force to cut and increasing the chance of slipping. Learning to sharpen your knives is a skill that every homesteader should master. With just a bit of practice and the right tools, you can keep your blades in excellent condition and ready for any task.
Why Sharp Knives Are Essential
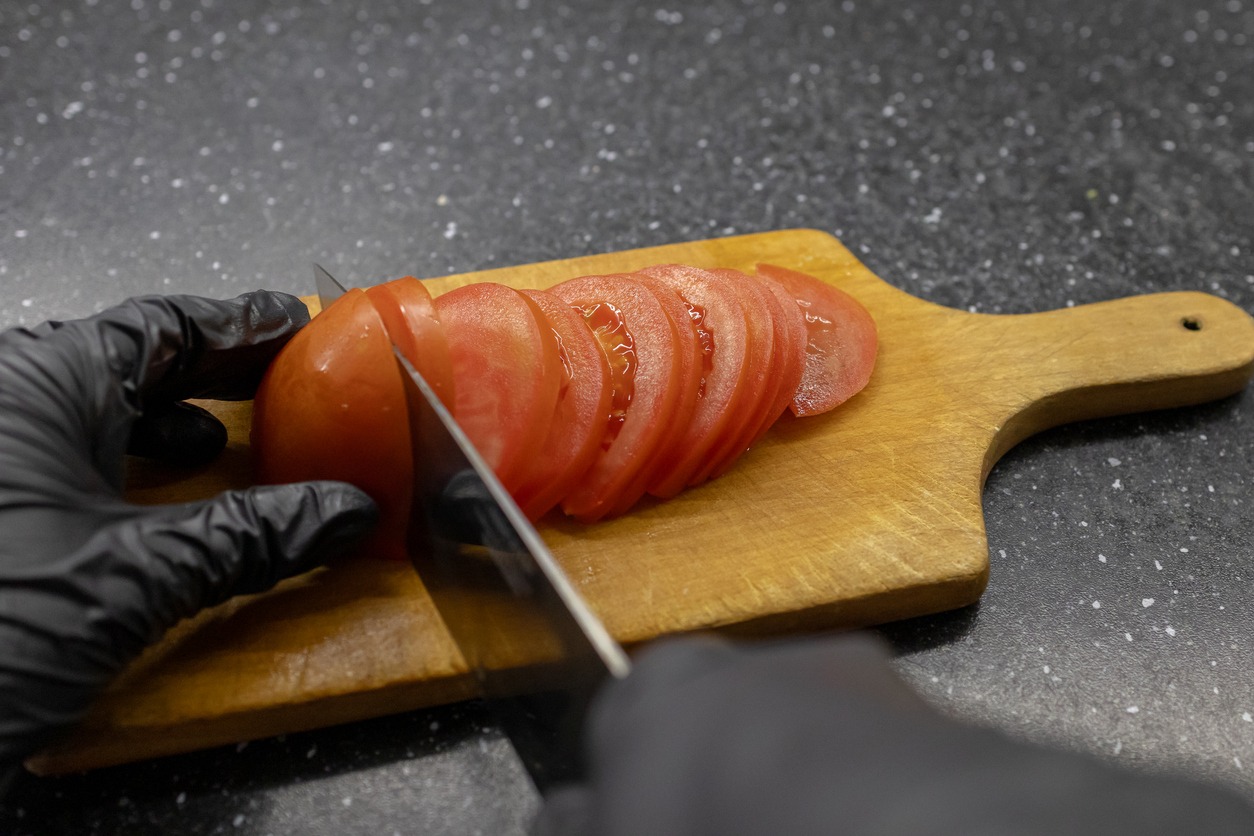
A sharp knife is much safer than a dull one. Why? Because a sharp edge cuts cleanly with minimal effort, giving you greater control. A dull blade, on the other hand, forces you to use more pressure, which increases the likelihood of the knife slipping. This is especially risky when you’re cutting tough or awkward materials like squash or rope. Imagine slicing through a tomato effortlessly, compared to the frustrating experience of a dull blade squishing it—clear evidence of why sharpness matters.
Efficiency is another key reason to keep your knives sharp. On a homestead, there’s always plenty to do, and using a dull knife slows you down. Over time, a dull blade can also damage itself, bending or chipping under the strain of excessive force. Regular sharpening preserves your knife's edge, saving you time and money on replacements while ensuring you always have a reliable tool on hand.
Basics of Knife Sharpening
Knife sharpening may seem intimidating, but it’s a straightforward process once you understand the fundamentals. At its core, sharpening involves restoring a blade’s edge so it’s functional and precise. This is typically done in three stages:
- Sharpening: The first step involves removing small amounts of metal to create a new edge. This is done with a coarse sharpening stone.
- Honing: Honing straightens the tiny teeth along the edge of the blade, making it smoother and more effective for cutting. It’s an essential step between full sharpenings to maintain the edge.
- Polishing: The final stage, polishing, refines the edge, making it razor-sharp and ready for detailed work.
The angle of your blade is critical during sharpening. Kitchen knives often require a narrower angle (around 14–16 degrees) for precision, while heavier-duty knives used for chopping or outdoor tasks work best with a broader angle. Staying consistent with your angle as you sharpen is vital—it’s the key to achieving a clean, even edge.
Tools You’ll Need for Sharpening
Before you start sharpening, it’s important to have the right tools. Quality equipment not only makes the process easier but also protects your knives from unnecessary damage. Here’s what you’ll need:
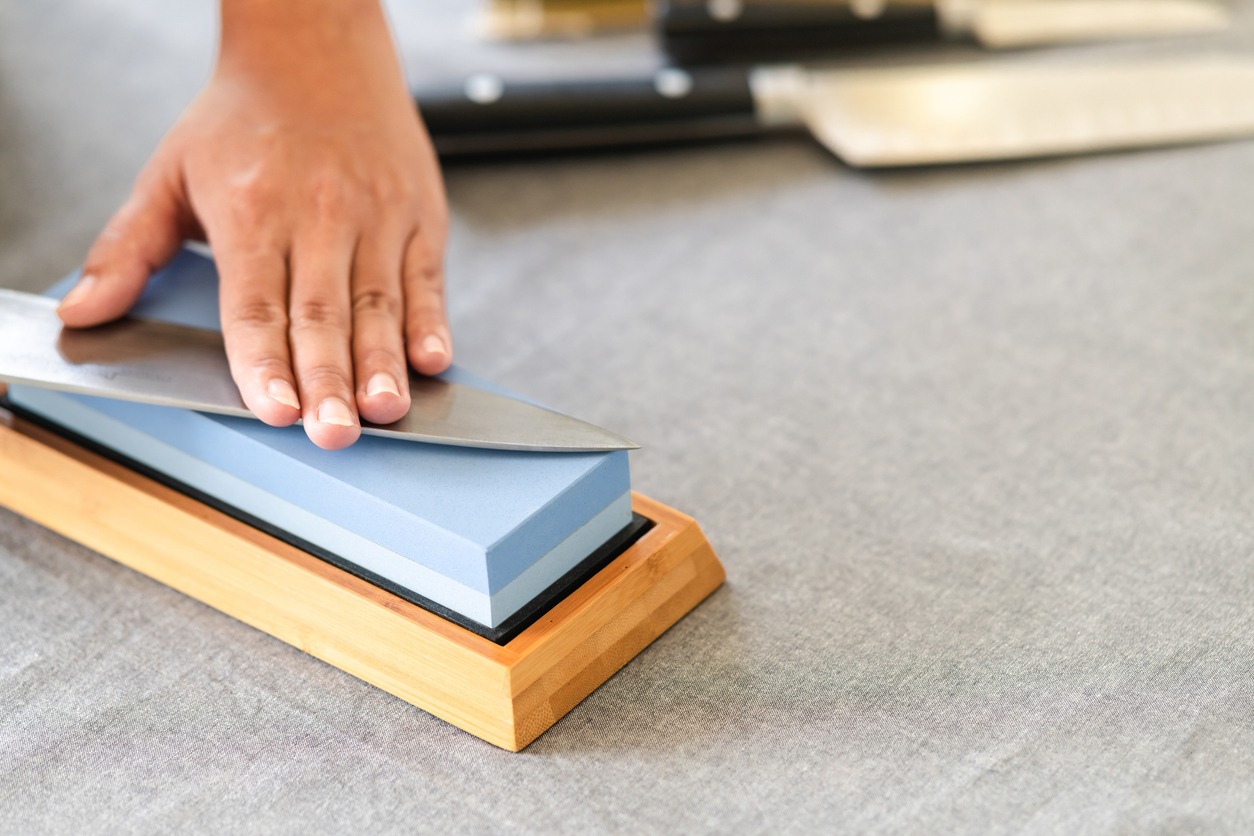
1. Combination Water Stone
A water stone is the most versatile and reliable tool for sharpening. Choose one with two sides: a coarse grit (like #1000) for sharpening and a finer grit (like #3000) for honing. Higher grits, such as #6000 or #8000, can be used for polishing but aren’t strictly necessary for most homestead tasks.
2. Leather Strop
A leather strop is essential for the final polishing stage. It removes microscopic burrs left after honing and aligns the blade’s edge, leaving it smooth and incredibly sharp. A stropping compound applied to the leather can further enhance the results.
3. Angle Clip
Maintaining the correct angle is one of the biggest challenges for beginners. An angle clip attaches to the knife and keeps it steady as you work, ensuring consistency.
4. Honing Rod
While a honing rod doesn’t technically sharpen, it’s crucial for maintaining the edge between sharpening sessions. Using a honing rod regularly reduces the need for frequent sharpening.
5. Other Accessories
Beginners might benefit from safety gloves to prevent accidents and a small cork to detect burrs during the sharpening process. A sharpening guide can also help you keep the right technique as you practice.
How to Sharpen Your Knife Step-by-Step
Now that you’ve got your tools ready, let’s dive into the sharpening process. Here’s how to get started:
1. Prepare Your Water Stone
Start by soaking your water stone in water for 10–15 minutes. You’ll notice bubbles rising as the stone absorbs water; once they stop, the stone is ready to use. A soaked stone provides better friction and prevents your blade from overheating during sharpening. Place the stone on a secure, non-slip surface to keep it steady as you work.
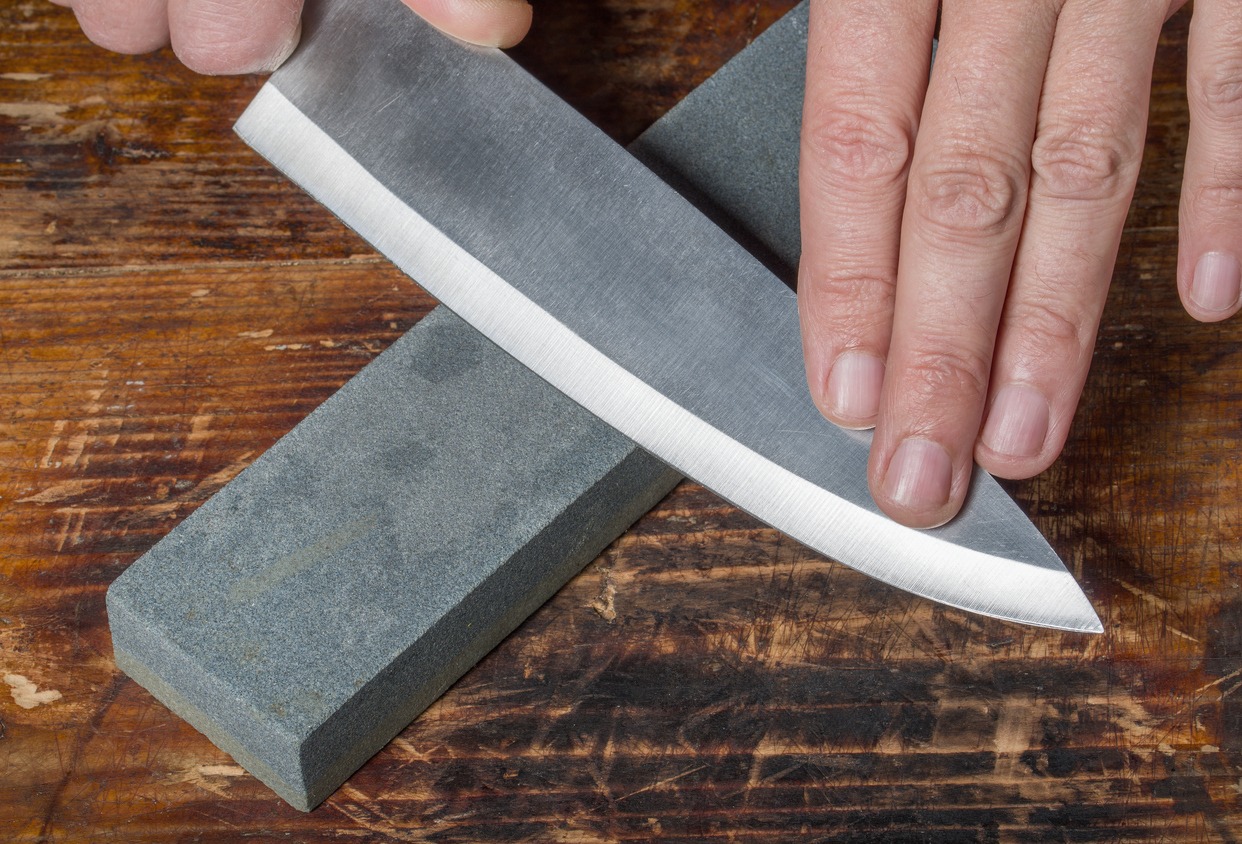
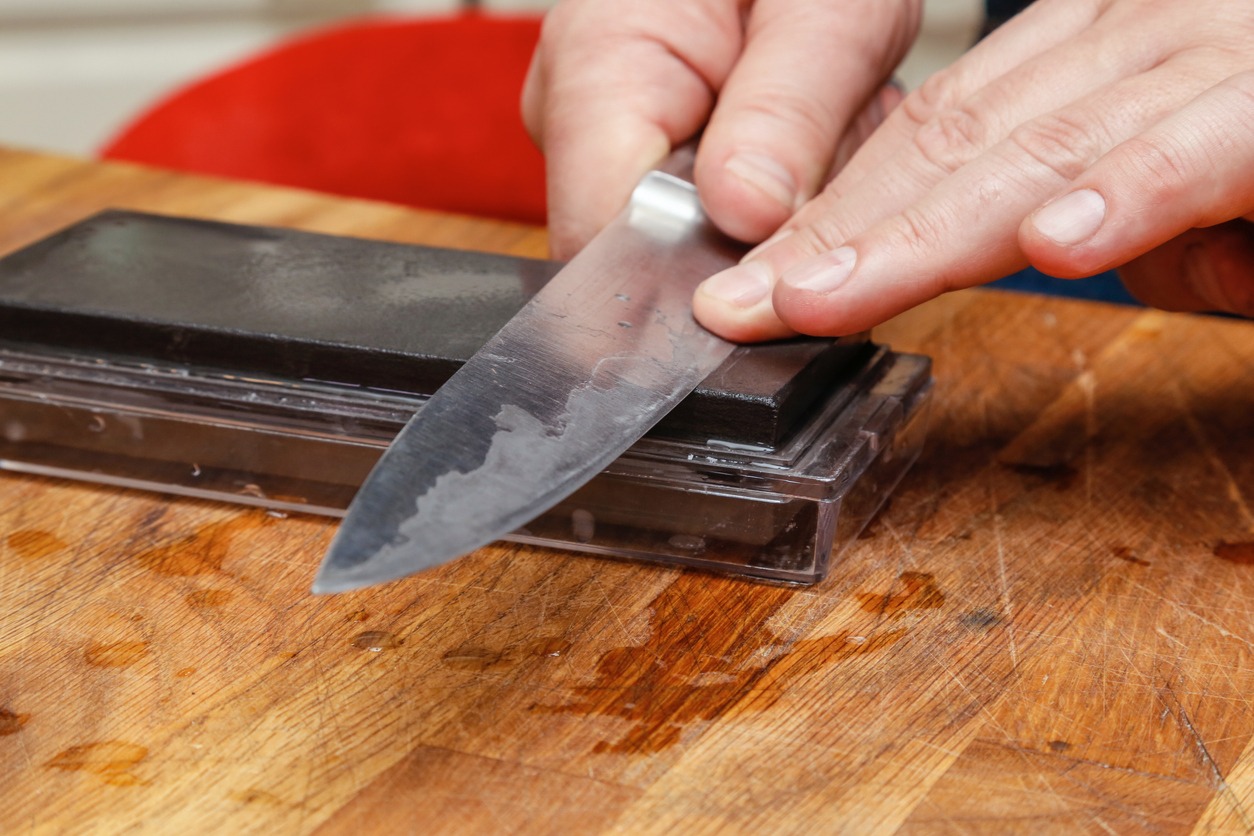
2. Begin Sharpening
Start with the coarse (#1000 grit) side of the water stone. Hold your knife at the correct angle—about 14–16 degrees for most kitchen knives. Using firm but controlled pressure, push the blade across the stone as if you’re slicing a thin layer off it. Move from the base of the blade to the tip, ensuring the entire edge gets sharpened. Repeat this motion until you feel a burr forming along the blade’s edge—a sign that the sharpening process is working.
3. Flip the Knife
Once you’ve raised a burr on one side, flip the knife over and repeat the process on the other side. Be consistent with your angle and pressure. This ensures the blade will have an even edge and perform efficiently.
4. Hone the Edge
Next, turn to the finer (#3000 grit) side of your waterstone. Hone the blade by repeating the same motion as before, but this time use lighter pressure. Honing smooths out the edge and prepares it for polishing. It’s especially important for knives used in precision tasks like slicing delicate produce.
5. Polish with a Strop
Finally, pull the blade along the leather strop to polish the edge. Alternate sides with each stroke, using slow and steady motions. If you’re using a stropping compound, apply it evenly across the leather for optimal results. Polishing not only enhances sharpness but also extends the edge’s lifespan, reducing the need for frequent sharpening.
How to Test Your Knife’s Sharpness
A sharp blade makes all the difference, and there are a few simple ways to test if your knife is ready for action:
- Paper Test: Hold a piece of paper vertically and try slicing it. A sharp knife will cut cleanly without tearing.
- Fingernail Test: Lightly touch the blade to your fingernail. A sharp edge will catch slightly instead of sliding off.
- Tomato Test: Try slicing a ripe tomato. A dull knife will crush the skin, while a sharp one will glide through effortlessly.
- Carrot Test: Chop a firm carrot to check how the blade handles harder materials.
These tests are quick and effective, giving you immediate feedback on your sharpening efforts.
Common Mistakes to Avoid
Sharpening knives takes practice, and it’s easy to make mistakes along the way. Here are some common pitfalls to watch out for:
1. Using Too Much Pressure
Let the sharpening stone do the work. Pressing too hard can cause uneven edges, remove more metal than necessary, and tire you out.
2. Inconsistent Angles
Maintaining a consistent angle is critical for an effective edge. If you’re struggling, use an angle clip to guide your technique.
3. Rushing the Process
Sharpening is a skill that takes time and patience. If you rush, you risk uneven edges and less-than-ideal results.
4. Neglecting the Tip
Many people forget to sharpen the tip of the blade. This area is crucial for detailed work, so be sure to address it.
5. Skipping Maintenance
Regular honing and light sharpening keep your knife in good condition. Don’t wait until your blade is completely dull to take action.
How to Maintain Your Knife’s Sharpness
Once you’ve sharpened your knife, the goal is to keep it sharp for as long as possible. Proper maintenance is key:
- Store Knives Safely: Use a knife block, magnetic strip, or protective sheath. Avoid tossing knives into a drawer where they can get damaged.
- Use the Right Cutting Boards: Stick to wooden or composite boards. Hard surfaces like glass can dull your knife quickly.
- Hone Regularly: Use a honing rod every few uses to keep the edge aligned and reduce the need for sharpening.
- Avoid Dishwashers: The harsh environment of a dishwasher can damage both the blade and the handle. Wash your knives by hand and dry them immediately.
Perform routine sharpness checks using the tests mentioned earlier so you’ll know when it’s time to sharpen again.
Final Thoughts
Knife sharpening is a rewarding skill that’s worth developing. It’s not just about keeping your tools in good shape; it’s about working more efficiently and safely on your homestead. With regular practice, the process becomes second nature, and you’ll find yourself relying less on outside services to keep your knives in top condition.
Remember, every knife has its own quirks. Take your time to understand the unique needs of each blade in your collection, and you’ll build confidence in your abilities. So grab your water stone, soak it well, and get to sharpening—your tools and your homestead tasks will thank you for it.